Showing posts with label paleo. Show all posts

Sunday, July 24, 2016

Paleo Crepes

Did you know that crepes are quick and easy to make? In fact, you can make them for an afternoon snack. Sure, having received the Analon Crepe Pan from last year's International Food Bloggers Conference made it easier and having an easy paleo crepe recipe kept it healthy, too!


Making crepes, even non-paleo crepes is pretty quick and doesn't require a lot of ingredients. Basically, crepe batter is a very thin batter which quickly cooks on a wide flat pan. You don't even have to have a crepe pan, a large skillet will work too!


Mise en place, a technique of preparing everything a head of time, helps make quick work of crepes. For Elana's crepes, it's simply eggs, coconut flour, coconut oil and water. That's great for a savory filling, maybe adding some coconut sugar would be nice for sweeter crepes.


Crepes cook quickly, maybe in 3 or 4 minutes and are delicate. I don't like to flip them because I lose so many to tearing, so I keep my batter on the thinner side.


 If I were making these as a treat or not worried about clean eating, this is where I'd dust them with powdered sugar!

My personal favorite filling is spinach, ham and mushrooms - I lean towards the savory over the sweet. I made crepes for breakfast this morning (yep, they're an all day snack) and realized that mushrooms need to be a staple item in my house!

What is your favorite filling?

Disclaimer: I received the pan at the IFBC conference and this post is one of three that I had to write as a blogger attending IFBC.

Sunday, June 21, 2015

An Even Better Paleo Mug Cake

Recently, I wanted a treat for dessert. I knew that mug cakes were quick and easy and I wouldn't have to turn on the oven on a hot summer night. I did a Google search for Paleo Mug Cake and found this recipe. I looked at that recipe and realized that it did look good, but I thought I knew how to make it a better paleo mug cake.

Just make sure you have a big enough mug!

Now let me warn you, as mug cakes go, this is a pretty labor intensive recipe. For most mug cakes, you just throw everything in a mug, give it a stir and pop it in the microwave. This recipe has two cooking cycles and you have to add ingredients in a sequence. But don't let that deter you; its still far easier than making a cake and having to warm up an oven.

An Even Better Paleo Mug Cake

Ingredients

4 tablespoons chocolate chips, divided
1 tablespoon coconut oil
2 tablespoons coconut flour
1 espresso shot
1/8 teaspoon baking soda
1 egg

Instructions

  1. Melt 3 tablespoons chocolate chips and coconut oil in the microwave in a mug. I will set my microwave to 70% power and microwave for 20 secs and stir, multiple times. This way, I get a good melt, but without burning them. Plus, sometimes chocolate chips hold their shape even though they are melted.
  2. Stir the coconut flour, espresso and baking soda into the melted chocolate. Then add the egg and mix it well - if you don't, you'll be left with little worm like strings of egg white in your cake, which is kind of weird.
  3. Add the remaining chocolate chips for little fudge-like nuggets in your cake. This step can be omitted, it makes for a pretty rich cake, especially if you use dark chocolate.
  4. Cook it all in the microwave for about a minute and a half. It should be dry when tested with a toothpick. Let it cool a bit and enjoy.

Sunday, September 28, 2014

Paleo Chicken and Waffles

Last weekend was the 2014 International Food Bloggers Conference, where brands and bloggers got together in Seattle to network, learn and enjoy good food.  With breakouts on Food, Writing and Technology, there was something for every food blogger. I had an enjoyable time and actually got to meet some bloggers in real life. Ironically, some of those I met live in my same neighborhood.

What was great about this year's conference was that there were many brands represented in the healthy space, and for me, that means acceptably paleo.  Dinner last night was brought to us by the swag from these brands.

  • The local sausage company, Isernio's, which makes clean chicken and pork (didn't know this before the conference) sausage.
  • Nutiva, which makes coconut products, like coconut oil and flour
  • NestFresh, a cage free, organic egg producer
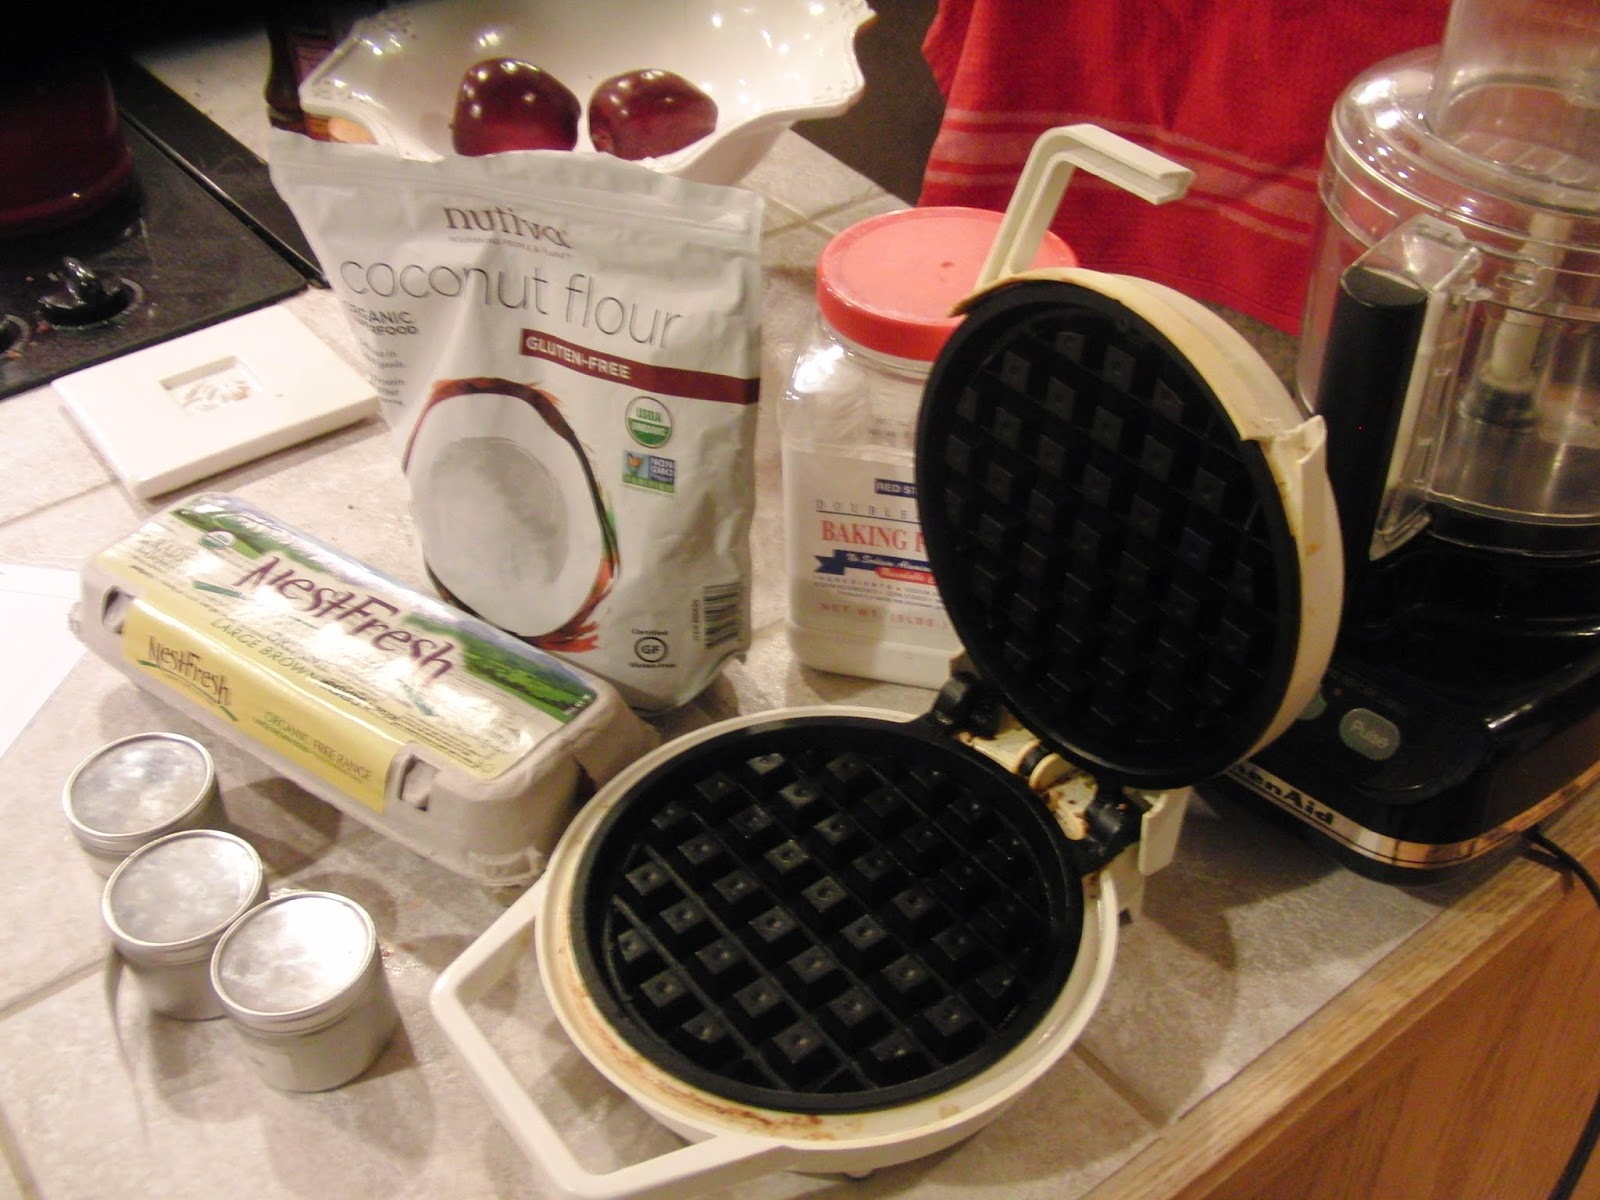
Almost mis en place!


I had a hole in my tummy that was looking to be filled with waffles, so that's what I decided to make.  After going through my paleo waffle recipes (thank you PaleOMG), I found that they all required coconut milk, of which we had none.

It was almost 8pm and we were getting hungry. I knew that its only an 8 minute trip, one way, to the grocery store. So, yes, I did make a grocery store run for coconut milk and a few add-ons as I dashed out the door.
Paleo chicken and waffles.

 I made PaleOMG's Savory Waffles and topped them with browned Isernio's Chicken Breakfast sausage and some of Heather's spicy (homegrown) ketchup. While the savory herbs in the waffles complimented the sausage, the waffles were dry. Her recipe actually tops them with a gravy and they needed the moisture from a gravy, for sure.

What was neat about IFBC was that these were all products I already enjoyed in my clean eating and I got to meet brand representatives and see some new products (more on that later).

Disclaimer: The chicken and eggs used in this post were some swag from the conference.  I ate this stuff already, so I already thought it was great before I got some free coupons! While I wasn't compensated for this post, I did receive a blogger's discount for attending the conference and this post is meeting a part of what I had to do in return for the discount.

Monday, May 05, 2014

A snack that I can say YES too

A few week's ago, I got a package in the mail that made me jump up and say "Yes!" I got some YES Bars to snack on. If you haven't heard of YES Bars, they originated in a home kitchen in Southern California when a mom was trying to make a healthy snack for her food sensitive son. Her son loved them, her husband loved them and their friends loved them.  People wanted to buy them and then she was able to get local stores to carry them and it just grew from there.

On top of having such a positive name, YES Bars are clean - gluten free, paleo friendly (meaning no grains, dairy or soy) and no fake, chemically stuff.  The ingredient lists are long, but their made of almonds, macademia nuts, dried fruits, pumpkin and sunflower seeds and the ingredients that really get me going are coffee and cayenne pepper! I like spicy and I love coffee, but if you're not like me, the Macadamia Chocolate Chip is for you. That just means there are more of the Coffee Cayenne for me!

The two flavors each have 4g protein and 16g carbohydrates, making it a great snack. Combined with the healthy fats, 170mg of omega-3s, its a snack that I can feel good about eating any time. It's not quite the bar for after my CrossFit work outs, but in the afternoon when my stomach starts to rumble from when i didn't pack enough lunch, well, if I had more of these bars, they'd be in my messenger bag ready for snacking.

The YES Bars are more like cookies than your typical nut and granola bar, with a nice, chewy texture. They don't fall apart when you sink your teeth into them, as its a moist-chewy cookie. The Macadamia Chocolate Chip had a nice chocolate taste, but not too sweet, as its made with dark chocolate.  The Coffee Cayenne bar warmed my mouth with the subtle spice, like a Mexican chile infused chocolate, not an open assault on your tastebuds.  The coffee was there in the background, making the bar live up to its name.

If these sound like your kind of clean eating and yet delicious snack, get some from TheYESBar.com.  There is a long list of stores in California (and one lucky coffee shop in Denver) that carry the bars as does Amazon Fresh Los Angeles. UPDATE: YES Bars are in Seattle! You can pick them up at Tom Douglas' Assembly Hall and soon to be at Healeo on Capital Hill.

What kind of things do you like for clean snacks? Which one of these sounds good to you?

Note: I got a few bars in trade for an honest review. I wouldn't write about them if I didn't like them. I liked them. I wish that stores in the Pacific Northwest carried these bars. I wish I had more to carry around with me for when I needed a snack.

Saturday, April 12, 2014

Alone with a bunch of Strawberries

My wife is attending the Disney Social Media Mom's conference this week; she left on Wednesday. The youngest two kids are on spring break and at Disneyland too, and on Friday, their brother joined them.

Heather went to Costco on Monday and bought a big container of strawberries, so its just me and a bunch of strawberries that need to be eaten before they spoil. Usually, in our house of five, with snacks and school lunches, the strawberries would just disappear.  But with only two of us for half of the week, our consumption rate slowed significantly.

But I came up with a simple and quick way to make a strawberry smoothie!


I don't like watered down drinks and so a smoothie with ice just isn't as smooth, but sliced strawberries freeze quickly and provide that cold iciness and a banana provides the smoothness.

They don't look it from this picture, but those are frozen strawberries. I cored them and then sliced them, just before we sat down and they froze while we ate dinner.  The banana was in the freezer too, but they take a little longer to freeze - at least it was cold when I threw it in the blender.

I used some almond milk for liquid, but coconut milk would probably be a good choice too. Or if you're feeling really like clean eating, make your own almond milk.

Quick Strawberry Banana Smoothie
Makes about 2 16 ounce glasses

Ingredients
2 good handfuls of strawberries
1 banana
dash of vanilla extract
about 1 cup almond milk

Instructions

  1. Wash, core and slice the strawberries. Arrange on a plate and put in the freezer.
  2. Put a banana in the freezer.
  3. Let them freeze for 15 - 30 minutes.
  4. Once you're ready, scrape the strawberries into your blender. 
  5. Peel and slice the banana in 1/2" slices into the blender.
  6. Add a dash of vanilla extract and about 1 cup of almond milk.
  7. Blend until smooth.
  8. Divide the smoothie among your glasses and enjoy!


Sunday, April 06, 2014

Leftover egg whites? Make meringues and coconut macaroons!

Earlier in the week, my wife made mayonnaise from scratch and we had leftover egg whites. A bunch of them.  When we had left over egg whites before, one of my friends on Facebook suggested that I make meringues.  So, some quick Google searches led me to Elana's Pantry where I found both a meringue recipe and a coconut macaroon recipe. Her website has lots of gluten free, grain free, dairy free and paleo recipes, so its a great resource for my cooking adventures.


Both recipes are easy to make only require a few ingredients. The macaroons were quick to make and quick to bake. I'm an early riser, so they were prepared and baked before everybody else was awake.  My idea was to make them for dessert tonight.


While they were cooling on the counter, the rest of my family started to wake up. "I only made 10 macaroons, that's two for each of us for dessert.  If you eat them before, then there are less for you for dessert."

It's 5pm as I write this and four macaroons have been eaten, one of them even for breakfast.

It was kind of awesome because I made new friends on the internet today and inspired me to make the meringues too.
We traded some tweets, shared the links to Elana's pantry and after CrossFit, I made meringues too.  They're easy to make, egg whites and maple syrup, but they take two hours to bake, and then an hour to cool.


They're in the oven and I've already been asked twice by the kids if they really take two hours to bake. Hopefully, this will turn out well and help teach the kids patience and that paleo desserts can be good. With the kids on spring break, they usually turn their idleness into cookie baking. Like octupling  the cookie recipe.  Maybe my treats can satisfy them for a bit.

Heather kept thinking I was making French macarons with all the egg white beating I was doing.  Those take a little more work, but I might try this recipe sometime when I'm feeling a little more ambitious in my cooking!

So there's still an hour to go on the meringues. I think I'm going to go drizzle chocolate on the coconut macaroons!  I hope you had a good weekend!

Sunday, March 16, 2014

Home Made Almond Milk

A few weeks ago, I saw a picture on Instagram of cold brew coffee and homemade almond milk. I wish I remembered exactly which picture, but it was a beautiful picture and really made me want to drink it.  It was also in the middle of the Whole Life Challenge and I'd drank nothing water, coffee and the occasional tea for about 4 weeks, so that added to the temptation. And it must have been quite a good picture, because it was pretty cold here in Seattle.

So, for the next few days, my Google searches were about how to make almond milk.  It is surprisingly easy!  And aside from some inactive soaking time, it is really quick.


All you need is a nut milk bag, available on Amazon for $7-10 and something to soak the nuts in.  It's basically a really fine mesh filter bag.

There are lots of almond milk recipes on the internet; they seem to vary in how much water you add to the nut milk after soaking and what kind of sweetener if any.  My wife's aunt changes out the water while the nuts are soaking. Some people use a food processor and some use a blender. But basically, its the same.

I've only tried sweetening my almond milk with honey and stevia and though I'm not a fan of stevia, the stevia was a better choice. But most of it, I drank unsweetened. It was nice to bring a small container to work and have that with my breakfast.

But best of all, its clean - no fake stuff, no chemical additives. Just nuts and water. Because it doesn't have the additives, it needs to be shaken before drinking and might not be as thick as commercial almond milk.  On my next batch, I'm going to try to add some coconut milk. It might add some sweetness and give it a thicker mouth feel.

On the downside, its not cheaper than the commercial stuff, at least for me to make it. With my nut supply and water ratio, it costs me about double what I can pay in the grocery store.  I get just over a pint with 1 cup of nuts and I don't have a cheaper nut supply than Costco. My wife's aunt, she has almond trees in her yard. It'll be pretty low cost for her. This is the trade off for eating clean though. Having raw nuts does give you some flexibility though, I was roasting nuts with all kinds of different seasonings and making milk. You can't do that with your container of roasted nuts!

Homemade Almond Milk
makes about 2 cups

Ingredients
1 cup raw almonds
water to cover nuts while soaking
2 cups water for blending
Something to sweeten the milk, optional. This could be stevia, honey, maple syrup, vanilla extract or ...

Directions

  1. Put the nuts in a container, cover with water and let soak for 24 - 48 hours. Change the water occasionally. The nuts will swell some. The longer you soak, the creamier the milk will be.
  2. After soaking, drain the nuts and place the nuts in a blender with 2 cups of fresh water.
  3. Blend the heck out of the nuts on the blender's highest speed. You want everything to be a relatively homogeneous slurry. It'll take a few minutes.
  4. Filter the nut milk through the nut milk bag into a container.  Squeeze the bag and get as much of the milk out as you can.  This is your finished product.  Some bags are designed to hang and let gravity do the work, but this part only takes a few minutes of squeezing.
  5. Mix in your sweetener, if you choose to be a little sweeter.
  6. Store your milk, covered, in the refrigerator. I'm told it will keep for a week, but I've never had enough to last that long!


Sunday, February 16, 2014

Making Sunday Breakfasts Special

Five days a week, I eat breakfast at my office. I do prepare my food in advance, so I've got something good to eat, but almost everyday, its at my desk. And by doing my food prep, I eat the same thing all week long.  So, on the weekends, and especially Sunday, because I have more time, I try to make those breakfasts special.

Typically, on Sunday, I'll read a cookbook as I eat my breakfast and enjoy my espresso.  Today, while there was no reading, I still found a way to make breakfast special.  As a crossfitter, I eat a lot of sweet potatoes and most of the breakfasts I make include them in some form.  And today, I found a new way to eat them.  I made paleo biscuits!

I split my biscuits in two and served them with some sauteed spinach and poached eggs. I've really gotten into poached eggs of late, but that is a topic for another post.

PaleoOMG's recipe for Shrimp and Jalapeno Sweet Potato biscuits was my inspiration. I had neither shrimp nor jalapenos, so I just left them out, and to fill the gap, I added some onion powder.  And to top it all off, they're Whole Life Challenge compliant (even for the Advanced nutrition challenge).  What, you thought I was going to top it with jam? Maybe bacon jam, once I figure out the right way to make that paleo.

The recipe is pretty quick and easy to make, they don't really take longer than making baking powder biscuits. I did microwave my sweet potato instead of cooking it in the oven, that sped things along.

I'll definitely be making these again and want to try the original recipe, but it was great to have biscuits in the morning with breakfast.

Ingredients
1 largish sweet potato, mashed
3 eggs, beaten
3 T bacon fat
3 T coconut flour
1 tsp baking powder
1/2 tsp garlic powder
1/2 tsp onion powder
1/2 tsp salt

Instructions

  1. Pre-heat your oven to 375.
  2. In a medium sized mixing bowl, mix the eggs into the sweet potato and then mix in the fat.
  3. Add the dry ingredients and mix until combined.
  4. Use an ice cream scoop and drop the batter on a baking sheet covered with parchment paper.
  5. Bake for 22-25 minutes and then eat them.
Makes about 8 drop biscuits.  Which probably isn't enough.

Sunday, January 26, 2014

Dates Warmed in Olive Oil with Sea Salt

I'm participating in the Whole Life Challenge and because I chose the advanced nutrition rules, my occasional dark chocolate for dessert is out.  But dates are a wonderful, wholesome, sweet snack and can make a delightful dessert.

A co-worker mentioned that he ate this at a Seattle restaurant and he and his wife made them when they were on a Whole 30 challenge.  I had a 2 pound box of dates from Costco and a sampler of Oregon Olive Mill oil, so I decided to make them myself.  Its not hard, only takes a few minutes and really showcases the ingredients. For this recipe, use the best quality oil and salt that you have, it will really make everything pop.


Oregon Olive Mill grows olives in the Willamette Valley on a fourth generation farm.  They harvest their own olives and them mill them in their own mill.  They have 13,000 trees that grow 3 varieties of olives making a top quality extra virgin olive oil.  Each variety yields an oil with a different taste, mouth feel and importantly, an after taste.   For this recipe, I used the Tuscan Extra Virgin Olive oil, because it had the most robust taste.

I used San Juan Island Sea Salt, a local Pacific North-West manufacturer of sea salt from our very own Salish Sea.  I got a sample of this salt at the International Food Blogger's Conference and it is a favorite of mine.   The salt has a brighter, crisper flavor than the french sea salts and is in much finer crystals than the Tibetan pink salt.  When I'm finishing something and want to taste the salt, this is the one I use.

I think that having a tasting party of olive oils, salts, wine, whisky or chocolate would be a pretty cool thing to do. Not all at once, but maybe a series of parties. Hmm, ideas...


Dates Warmed in Olive Oil with Sea Salt
less than 10 minutes

Ingredients

1-1/2 Tablespoon of your best olive oil
3 - 4 dates, pitted
Sea salt, fine grained, best quality


  1. Warm the olive oil in a small pan, over medium heat. You don't want the oil to get warm like you'd cook meat with it, but just warm.
  2. Put the pitted dates in the olive oil and gently roll them in the olive oil.  Do this until the dates are warmed through, 3 or 4 minutes.
  3. Once the dates are warmed, put them on a plate and give them a generous sprinkle of sea salt.
  4. Serve and enjoy!

Disclaimer: Other than the sampler of the Oregon Mill Olive Oil, I was not compensated for this post. The opinion and recipe are my own.  And if I wasn't paleo, I'd be dipping bread in this oil and just eating it that way. It's that good.


Saturday, January 25, 2014

Food Fun This Week

This has probably been the most foodie week since I went to the International Food Bloggers Conference in September. It was awesome, I got to meet Michelle Tam from Nom Nom Paleo, met the awesome marketing crew from Tessemae's and got to try food from some cool food trucks at a Yelp party!


 On Sunday, I went to the book signing for Michelle Tam's book, Food for Humans. Her blog is one that was really helpful in my transition to eating Paleo. On top of having delicious, healthy recipes, she's got a great personality which comes out in her writing. And she also went to Cal, we were there at the same time, but she graduated a year before me!

Her husband, Henry, was there too and it was really cool to learn how they went about their publishing experience. By his reports, they did it wrong, but they made a pretty awesome book out of it!


Tuesday, I went to dinner with a few other local food bloggers and the marketing team from Tessemae's. This was quite exciting, because Tessemae's is all about sauces and dressings made with real, clean ingredients, which fit in perfectly with my lifestyle.  I do a lot of label reading and when you can find a brand that you trust and tastes awesome, it's a realy nice thing.

We got about 6 bottles of dressing and I've been using it in my tuna salad and I'm looking forward to hot wings at our Super Bowl watching party. Go Hawks!


Thursday night was the Yelp Holiday Hangover Party in a really cool space in Pioneer Square.  I blew out my Whole Life Challenge nutrition points and enjoyed Theo Chocolates, Ezells Fried Chicken and street tacos from Contigo. It was so worth it.


This wasn't a normal week for me, but it was a good one!  What did you eat this week?

Monday, January 13, 2014

Make Your Own Lara Bars

Because I'm participating in the Whole Life Challenge, I bought a package of dates earlier this week.  Dates are a handy quick snack and great if you want something sweet. I enjoy eating the dates straight, wrapped in prosciutto, or as an ingredient in my paleo protein shakes. I also picked up a box of Lara Bars which I enjoy as well.

Having a bounty of dates, I decided to try making my own Lara Bars.  And because I can never find the Cappuccino Lara Bar, that was the flavor I decided to take on.

They were pretty simple to make and this way you can make your own flavor combinations.  I could have used some cocoa to make this a mocha Lara Bar.  Another alternative I'd like to try would be with some unsweetened coconut and maybe chocolate (once the WLC is done).

What flavors do you think would be good to try?


Ingredients
12 dates, seeded
about 1/2 cup pecans and roasted almonds - about equal in quantity to the dates
1 tablespoon of finely ground coffee beans


  1. Cut the dates into small pieces and pulse in the small bowl of a food processor until they are smaller. Yes, I know how silly of an instruction that sounds.
  2. Add the nuts and continue to pulse the dates and nuts.   The dates will become stickier and pickup the nuts and the nuts will get to a chopped consistency.
  3. Add the ground coffee and pulse it a little more.  It will probably form some balls in the food processor bowl.
  4. Dump the mixture into another bowl and further mix it with your hands.  When its well mixed, roll it into a ball.
  5. Place the ball between two sheets of parchment paper and press into a bar like shape.  I used my hands to form a rectangle and then used a rolling pin to help flatten it (Thanks to Nom Nom Paleo for that set of instructions).
  6. Cut the bar into individual serving pieces.
  7. Wrap in your parchment paper so they don't stick together and store in the refrigerator.

Sunday, December 08, 2013

Paleo Salted Caramel Chocolate Bacon Bark

I think that every word in that title is awesome. Any one of those in a dessert is great and if you combine them, its like multiplying awesomness.  At my CrossFit box's holiday party, they were going to have a paleo recipe contest.  When I read this recipe on Civilized Caveman's blog, I knew it was the one I was going to make.

George, from Civilized Caveman, got a copy of The Paleo Chocolate Lover's Cookbook, and he shared the recipe on his blog.  My local library has 16 copies and one is on hold for me. I'm waiting with bated breath.

All in all, its pretty easy to make, but it does take some time to allow the chocolate and caramel to cool.  When I made a larger, second batch, I actually took advantage of the unusually cold weather we were having in Seattle to cool my caramel on the back porch!
My daughter helped me with these photos. The film strip doesn't do them justice.
Don't worry that the recipe has warnings to wear gloves, the coconut milk and sugar don't seem to get as hot as non-paleo caramel's cream and sugar, but do use a large enough pan.  I made a single batch in a 2 quart sauce pan and it does bubble up.  Do clear a bit of space in your fridge so that you can fit your chocolate to cool on a flat space.
Reading the recipe on my borrowed tablet on a Belkin Tablet Chef Stand!

Also, give it plenty of time to cook.  My first batch, I cooked a little hotter than my second batch and it came out much more like a sticky caramel candy, but it was harder to drizzle over the top of the chocolate.  My second batch, I simmered longer, but at a lower temperature, and it was a thick caramel sauce.

You'll see in one of my pictures, I wasn't using parchment paper, but some plastic wrap.  Make sure whatever layer you use covers the sides of your pan, don't just use a Silpat. The chocolate will leak under and stick to the pan and you won't get nice bark.
Bacon, bacon, bacon!
I also had one not-really-a-problem problem.  Both times, I had too much bacon.  I mean, too much bacon for my candy, but between my kids and I, we ate it right up.  Some problems, like high sales rates, are good problems to have.

The Paleo Salted Caramel Chocolate Bacon Bark was a hit at the party, even among the people that weren't all that into sweet and savory combined into one.  Alas, it was not the winning recipe of the night; that honor went to a Korean BBQ chicken recipe.  I'll admit it, it was really great chicken, cooked perfectly, with just the right amount of smokiness from the grill.

If you make it, let me know how it goes!

Sunday, December 01, 2013

Paleo Sriracha Chicken Thighs

Yesterday for dinner, my 11 year old son and I made Sriracha Chicken Thighs.  I had seen this Orange Sriracha Chicken recipe on one of my favorite paleo recipe websites, Nom Nom Paleo, but didn't have half of the ingredients.  But I had a fresh orange and sriracha sauce so I decided to make something loosely based upon her recipe. And I had a hungry helper.
Heather takes the best pictures of food. http://instagram.com/p/hXHPF9zXjd/
We made a simple, dual purpose sauce and marinade and baked the chicken.  Pretty easy and he got to continue to play Xbox during the time it took to warm up the oven and cook the chicken.

A few notes about this recipe.  Firstly, I used the convection setting on our oven. That contributed to the nicely browned and mostly crisp, chicken skin.  I cooked it skin side up first, then flipped it, and flipped it back again to finish it.  When the skin side was down, the skin got a little soggy and didn't quite crisp up the same when I finished it skin side up. So, start it skin side down or don't flip it at all.

Secondly, I used the marinade as part of my glaze.  I've been taught that this is not a good thing to do, because the marinade picks up beasties from the meat.  I figured that I was going to reduce the marinade that it would cook/kill them and I added a little water so that it would stay at a higher heat a little longer while reducing.  If that makes you uncomfortable, make more sauce than I show below and keep them separate.

I hadn't planned on turning this dinner into a post, but the comments on some of the photos were encouraging me to post a recipe, so here goes. Thanks for the encouragement!

Sriracha Chicken Thighs

10 minutes preparation, 20 - 30 minutes marination, 40 minutes cooking

Ingredients

Juice of one orange
Big squeeze of Sriracha, maybe a tablespoon or so
About 1/4 cup of finely diced red onion
About 1/2 teaspoon salt
Big teaspoon of honey
10 chicken thighs, skin on
Sesame seeds
Small amount of chopped parsley

  1. Turn on your oven to 400 degrees on Convection bake.  
  2. Prepare the sauce. Combine the orange juice, sriracha sauce, onion and salt and stir until combined.  Taste it and add some honey to take the edge off.  Or don't taste it and just add the honey, then taste it to see if its not too hot.
  3. Put the chicken thighs in a big ziploc bag with about half of the sauce to marinade. Let it marinate until your oven is up to temperature or you've played a few games of Call of Duty multiplayer.
  4. Line a rimmed baking sheet with aluminum foil, maybe two of them depending upon the size of your thighs (the chicken thighs, silly). 
  5. Remove the thighs from the bag and arrange them on the baking sheets, skin side down. Give them some space so that they'll brown and not steam each other. Save the marinade for reduction, if you're going to do that.  Put them in the oven for 20 minutes. You'll flip them at that point.
  6. While the chicken is cooking, reduce the sauce in a small saucepan over pretty high heat.  If you're using saved marinade, add a little water, a little less than a 1/4 cup, so that it can boil for longer.  When the marinade part has reduced, add the remaining sauce and reduce it again.  Once it has been reduced, remove the sauce from heat and wait for the chickens. The sauce shouldn't be runny, but not as thick as a jam.
  7. After cooking the thighs for 20 minutes, flip them skin side up and cook them for another 15 minutes.  This should result in nicely browned skin.
  8. After the 15 minutes or when the chicken is pretty much cooked and the skin is nice and crisp, spread the sauce on your thighs (still the chicken thighs), on the skin side. Put them back in the oven for about 5 minutes to kind of turn the sauce into a glaze.
  9. When they're done or you're ready to eat, put the chicken thighs on a serving dish and sprinkle with the parsley and sesame seeds.
  10. Eat and enjoy!


Try it and let me know how it goes!

Monday, November 11, 2013

Farm Fresh Brussels Sprouts

Fresh on the stalks. Did you know they grew this way?
I received some Brussels Sprouts from Farmstr and turned them into Roasted Brussels Sprouts with Capers and Lemony Browned Butter, a recipe I found on the Seattle Times All You Can Eat Blog.  Farmstr, a Seattle startup that connects local farmers and consumers.  It helps support sustainable farming and putting farm fresh food on people's table at reasonable prices.  When they offered my wife a box of Brussels, I was all over that as I love Brussels Sprouts. In fact, it got me into a Brussels Sprouts mood, so this is a two-fer of Brussels Sprouts.

I met Janelle, the Farmstr CEO, in front of my office in South Lake Union.  She drove there in an old half-ton Ford pick up truck, with the box of Brussels Sprouts in the back.  We were having a great chat about the benefits of paleo eating and what Farmstr had to offer and generally how cool the whole process was when the cops decided that they didn't like how she had parked and cut our exchange short.

That's how Farmstr works (minus the cops); farmers setup drop-off points and people reserve their eggs, grass fed beef or whatever is in season.  These sprouts came from Stanwood because the farmer's original, commercial buyer wanted Brussels in their store earlier than anticipated, so they needed a buyer once they were ripe.  And I lucked out.

One of the easiest way to cook Brussels Sprouts is roasting them.  Season, toss with your favorite oil and throw them in the oven.  You don't even have to turn them mid-way through, but it helps.

Brussels sprouts this way taste great, but they taste even better with a bit of acid. This recipe did it with both lemons and capers.  While the Brussels sprouts roasted, I browned some butter added capers and lemon juice and BOOM, insta-sauce.


I made meatloaf muffins and some pan fried sweet potatoes to accompany the Brussels Sprouts and had a nice, paleo meal for my family. With locally produced vegetables, from a farmer that I could actually meet and a farm I could actually visit, no less.


I had Brussels Sprouts on my mind.  After eating meatloaf with roasted Brussels Sprouts Friday night, I had planned Saturday's dinner to use more sprouts.  I had some delicata squash, a pork loin and was going to cream the Brussels Sprouts, but figure out how to do it Paleo.

But life got in the way and my daughter's swim meet went rather late.  Then Heather roasted some sprouts with sausage and used the last of the Farmstr sprouts.  I wasn't going to be stopped, though.  I got some sprouts at my grocery store, which cost $0.20 per pound more than the fresh sprouts from Stanwood, Washington.

I found this recipe on Saveur Magazine, Creamed Brussels Sprouts, and decided to give it a go.  The recipe calls for cream (hence the name), which alas is not paleo.  But coconut milk is!  So, I replaced the cream and sugar with a whole can of full fat coconut milk, and it worked great!

How do you like to eat Brussels Sprouts? Let me know in the comments.  I haven't even mentioned how good they are with bacon or better yet, pancetta.  If I had more sprouts, that would be my next way to prepare them.

Read more about Farmstr on their FAQ and if you're around Seattle, check out what they have to offer and if you like Brussels Sprouts, get some!

I wasn't compensated for this post, other than some Brussels Sprouts and its all my opinion.  I think Community Supported Agriculture is pretty cool and eating, clean, real food is good for you.

Saturday, November 09, 2013

Baked Eggs in Avocados

A few weeks back was my 17th wedding anniversary.  Though our anniversary fell on Saturday, I planned on taking Friday off so I could spend some time with my wife (try it, its way better than working).  The night before, my wife got this text message from her sister.  It served as the inspiration for our anniversary breakfast the next day.

Baking eggs in an avocado is pretty simple. Pre-heat the oven to 375 degrees and put an egg into the hollow of an avocado.  Depending upon the size of your egg and the size of the avocado seed, you might need to scoop some extra avocado out.  I didn't do that and lost quite a bit of egg white in the over flow.  But then you get to eat some avocado early, as a preview of whats to come.

Season with salt and pepper and bake the avocado for 20 to 25 minutes. I think that baked eggs are really good, but they take longer to cook than you think.  When it's done drizzle with your favorite hot sauce, I like the sriracha because its thicker and holds its shape.


The texture of the avocado didn't really change with baking, as sometimes warm mushy things can be weird to eat. With some bacon and coffee (and the obligatory glass of water), it makes a great breakfast! 

You can use an avocado as a little bowl for all kinds of things.  I sometimes will make tuna salad and fill the avocado.  Let me know what kinds of things you like to put in your avocados!

Enjoy!

Sunday, October 06, 2013

Cooking with swag

Having recently attended the 2013 International Food Blogger's Conference, we came home with a great deal of swag, particularly small sized samples of gourmet and healthy food.  You might have seen Heather's picture of our counter.  Being local, which meant we drove home each night, many companies would push us to take their extras. And we sure did, didn't we?


Last weekend, with the onset of fall in the Pacific Northwest, I decided to make Pumpkin Spice Almond Butter Muffins, which I saw posted on Hybrid Athlete.  Not only were the muffins paleo and had fall flavors, the recipe called for ingredients which I had received as swag at the conference.

The honey, vanilla and cinnamon were all conference swag.

Manuka Doctor Honey - Manuka honey from New Zealand with supposed health benefits.  But what is really awesome about it is the flavor and consistency.  It's thick, not like runny corn syrup honey with a nice floral taste.  While I've cooked with it some, I've probably eaten just as much straight from a spoon.

Lagrima Vanilla - Lagrima Vanilla is a local, boutique vanilla producer. The vanilla is smooth, without that bite that comes from most commercial vanilla. They use Ugandan beans and manufacture just a few cities north of me. I hope to check out their production facility someday and share that adventure on my blog.

Yen Bai Cinnamon - Sahale Snacks has scoured the earth and found the best tasting cinnamon in the forests of Viet Nam.  It has a much brighter flavor than other cinnamons I've tasted, with spicy bite more like red hots.


The muffins were a nice treat to welcome fall. My kids snatched up four before I even had a chance to eat any. Luckily, I was able to save some for my breakfasts at work - the idea was to make breakfast for the week, but alas, after my kids, there were only enough for two breakfasts (with some nice leftover frittata).

Using a few tips I got during the food photography sessions with Andrew Scrivani (just go watch his blog for a few minutes), I took this picture for your enjoyment!


Eat clean and stay fit!

Monday, September 16, 2013

Paleo Cookies for Cavemen

My wife was lucky enough to get a sampling of Caveman Cookies and I was lucky enough to get to eat them.  We've been on a journey, changing the way we eat and workout, following the Paleo lifestyle.  Treats have changed as well.  Caveman Cookies are a gluten-free, all natural paleo cookie treat. 
The cookies were sweet and chewy, with subtle flavors. I was partial to the New World Cookie, with pumpkin and cranberries and the little bit of spice in the Rain Forest cookie.  Sadly, they don't have a chocolate chip cookie (made with dark chocolate to keep it paleo). Yet.  They've since added a hazelnut and carob based cookie which would be pretty nice to try.

These cookies are not crisp cookies, but soft and chewy. That's not something that everybody goes for, but I'm a chewy cookie kind of guy. A nice, chewy molasses cookie.

These are great cookies to keep around as snacks. I have two still in my messenger back, waiting for when I need a paleo treat.  But, keep in mind, its a paleo treat. That doesn't make it the same as a cookie with wheat flour, sugar and butter.  Save those for your cheat days and grab a Caveman cookie on the day that you want to be good, but still treat your self.

Disclosure: I received no compensation for this post, other than cookies. I'll do a lot for cookies (like donate blood), but it'll still be ethical and honest.

Saturday, May 18, 2013

Yesterday's leftovers make an awesome breakfast

Food by Beau, photo by Heather.
Yesterday for dinner, I made lettuce wrap tacos with honey ancho Chile  glazed sweet potatoes. I still cooked 3 pounds of lean ground beef even though we were one athlete down at our house.
I was pleased to see that their were leftovers and I planned on turning them into a nice scramble this morning.

As I was cleaning my espresso machine and cooking my eggs at the same time, I got a little side tracked and my scramble turned into more of an omelet.  Still quite delicious.


About a week ago, I was preparing breakfast in the office and one of my co-workers noticed I was eating Paleo. She wasn't paleo herself, but someone on her team was, so she recognized it. We started talking about it and the health gains I have made since I started and she asked me if I ever felt deprived or bored being limited to certain foods.

I don't feel limited at all. There are so many combinations that you can make. Take my taco dinner, for example. If it wasn't in lettuce leaves and all mixed together it would have been a hash,waiting for a nice tomatillo sauce to be poured on top.  The same ingredients make a great breakfast scramble, which saves a ton of time.

Paleo - not only am I healthier but it helps me save time (with a little advanced preparation).

Monday, May 06, 2013

A few paleo living tips and tricks

Here are a few tips and tricks I've come across while making the transition to paleo-ish living.  It is a little harder to eat cleaner, but these are some things I've picked up along the way. Maybe they'll help make it easier for you.

Plan ahead

I go to a 6 AM CrossFit session and I want to get as much sleep as I possibly can.  So, every night, I layout my work out clothes at the end of my bed.  I choose my work clothes and pack them in my WOD bag (hopefully I remember shoes and underwear). My kids make fun of me for being like a little school boy, but I can get out of the house and be ready for the day (lunch is also made the night before) in less than 17 minutes.


But I also make my breakfasts for the week on Sunday afternoon.  Many paleo living bloggers cook for a full week of meals and vegetables. I'm not that far along yet, but I'll grill some chicken and fry some bacon and take some avocados in to the office for the week.  I dice the chicken and bacon and warm it in the microwave and serve with diced avocados.  Even vegetarians have commented that it looks like a good breakfast!

I keep it constantly varied by changing up the spices. I can make Asian, Thai, Mexican, Italian or Greek chicken all for breakfast with different spices and marinades.  I'm not going to get bored eating paleo and I don't feel like I'm missing anything!

Be Prepared

This one goes hand in hand with Plan Ahead.  There are days when the WOD was much harder and my lunch just seems that much smaller.  But I carry what I call Emergency Food in my messenger bag.  I've got a couple of Lara Bars (almost all of them are paleo -  the ones with chocolate chips have added sugar and some have peanuts) or Goodness Knows Bars (not paleo) in there.  Sometimes they slip to the bottom of my bag and get smushed a bit, but a smushed one still fills the hole in my tummy!

My favorites are the Coconut Cream Pie and Chocolate Coconut Chew, but the Key Lime is a nice bright twist some times.  And as I was checking out their website, I noticed that there is a Cappuccino flavor that is also paleo.  Why doesn't my grocery store carry this flavor!

There is a similarity to carrying Gold Fish crackers (really not paleo) for your young children and what I'm doing, but mine isn't so crummy. And I don't whine, contrary to the ending of the previous paragraph.

Sweet Potatoes

I've recently discovered how magical Sweet Potatoes are.  The orange ones, sometimes called yams, are the ones I'm talking about. The white sweet potatoes are even more starchy and fall on the paleo to be avoided list, but the orange ones are more acceptable, especially from an athletic perspective (less so if you're paleo trying to lose weight).

Sweet potatoes are a great source of carbs for back loading and preparing for a workout.  They make great french fries (and if baked, they can be paleo).  But I knew all those things already.

What I recently discovered is that they microwave super easy and can be made into cubed or smashed sweet potatoes in my office lunch.  When topped with some bacon, dried herbs or leftover sauce from something slow-cooked they taste even better.  Once at home, I even fried some crushed sage leaves in coconut oil for pure paleo goodness on top of the sweet potatoes.

Vanilla whey protein powder

Okay, so this one isn't strict paleo but it fits in with the primal or paleo for athletes life-style.  Protein powder is an easy way to get calories and protein, especially in that critical 30 minutes post working out.  And that stuff is expensive!  Its an item on a very short list that I think that we should buy at Costco, because it doesn't spoil and its definitely a buy in bulk item.

The problem with Costco is trying something the first time. The Cytosport Vanilla Whey Protein is way too sweet, and that opinion was shared by all of my family. So, this 6 pound bag of liquid cake batter sat in the pantry for almost 6 months.  As we ran out of the Chocolate flavor and hadn't yet made the time consuming trip to Costco (there is no such thing as a quick Costco run), I started to use the cloyingly sweet Vanilla Whey protein.

I prepare my water bottle (see Plan Ahead, above) the night before. I fill it with the powder and after working out the next morning, I add the water at my CrossFit box.  I got the wild idea to put some instant coffee in with the powder, thinking it might take an edge off the sweetness.  It was a home-run! While it wasn't an excellent coffee drink, it was way better than cake batter drink. It was kind of like a frappuchino, but one that I felt better about drinking.  The slight bitterness of the instant coffee countered the overly sweet powder and made it drinkable.

Do you follow a paleo/primal lifestyle?  Share some tips that help you get by in the comments!

Sunday, April 14, 2013

Hip cooks at Hipcooks

This week I attended a cooking class at Hipcooks Seattle, courtesy of Goodness Knows snack squares, with a few bloggers and social media people from around Seattle.  As my blog has humble traffic and my Facebook feed is mostly filled with updates on my CrossFit workouts, I was pretty honored to be in that bunch.  Plus, I was the only guy in the class, so lunch with a bunch of ladies always works out.

I have to be honest, it started out with two faux pas on my part.  First, I messed up the calendar and put the wrong location down.  Instead of going someplace about 5 blocks from my work - walkable - we took a 15 minute drive, paid $4 to park and then drove back.  Luckily, we were ahead of schedule and were only a few minutes late to lunch.  Obviously, I was still flustered about the wrong location and when I was introduced to our host, Jenni Hogan, the first thing that came out of my mouth was "Hello. You're tall."  We've got a big flat panel TV and I've seen her do the traffic many times, but even on our big TV, she didn't seem model tall.  Evidently, she used to be a rower and she was wearing tall heels. And she's also probably the first big media personality that I've met.  I wonder if I would have been able to fit both feet in my mouth if I had been as lucky as Whit to interview Scarlett Johannsen (in my research for this post, I learned she canceled but Whit interviewed Samuel Jackson instead!).

We participated in Hipcooks Healthy, Fresh and Zingy class, making two red pepper soups and a seared tuna with fresh mango cucumber salsa.  I was a little concerned heading to a cooking class given my paleo-ish eating.  But with a name like Healthy, Fresh and Zingy I had little to worry about, although there is photographic evidence of me holding bread, gently rubbing it with heads of garlic.
I didn't eat any! Photo by @unitedstatesofmotherhood
The Hipcooks class was fun and about just cooking with your senses. No measuring, kind of a tough one for me, just doing it all by feel.  I do like a recipe as a starting point, but after I become familiar with it, I do it by feel.

I learned a few awesome things too.  When roast peppers, I usually cut them into slices before hand.  I lose the liquor, the juices from inside the pepper, so I'll be roasting peppers whole and then cutting them into slices/strips.  Our salsa had lime zest in it and we discussed using leftover zest to make citrus sugars which would make a nice hostess give or rimmer for a cocktail. I'd be interested in trying to make lemon pepper, as we've been eating a lot of chicken lately. I even learned how to pour two soups in a bowl and keep them separated and make a ying-yang look (sorry, no photos).

I wasn't the only one who was learning things - two of the ladies don't cook and they've got photographic evidence of them making some pretty good food now. And now, their friends want Kat to make it for them.
We chatted and snacked on Goodness Knows squares. They're pretty good, not paleo, but small enough that the amount of non-paleo things is pretty negligible.  A cheat with some grains and sugars, but all in all still a good snack.  Since there are four bites in a package, I could even cheat-snack and not feel too bad about it.  Its not like its a whole slice of bread.  I really like the Very Cranberry one (the only one I've tried so far), but my kids and wife like them a lot.  Goodness Knows snack bars will have a place in my messenger bag as emergency snack food. They're currently only available in Portland, Seattle and Denver, but if you pester them on twitter, I bet you could find out when they're coming to you!

After our snack, we went back to class and made a super easy strawberry sorbet. I've made sorbet before, but it involved sugar syrups and mashed berries and my ice cream maker.  This was just frozen strawberries, some vanilla bean paste and a blender!  Throw them all together, blend till smooth and enjoy! I think that this could even be made as a one person snack, say for when a kid comes home from school on a hot summer day (if we ever get those in the Pacific NorthWest).

It was a great break from work to cook and meet and network with some cool people.  I got to meet Kerri's new baby, who was quite possibly the quietest baby I've ever met.  Hopefully, with help from Kristin and my nagging, Heather will move her blog to Wordpress.