Did you know that crepes are quick and easy to make? In fact, you can make them for an afternoon snack. Sure, having received the Analon Crepe Pan from last year's International Food Bloggers Conference made it easier and having an easy paleo crepe recipe kept it healthy, too!
Making crepes, even non-paleo crepes is pretty quick and doesn't require a lot of ingredients. Basically, crepe batter is a very thin batter which quickly cooks on a wide flat pan. You don't even have to have a crepe pan, a large skillet will work too!
Mise en place, a technique of preparing everything a head of time, helps make quick work of crepes. For Elana's crepes, it's simply eggs, coconut flour, coconut oil and water. That's great for a savory filling, maybe adding some coconut sugar would be nice for sweeter crepes.
Crepes cook quickly, maybe in 3 or 4 minutes and are delicate. I don't like to flip them because I lose so many to tearing, so I keep my batter on the thinner side.
If I were making these as a treat or not worried about clean eating, this is where I'd dust them with powdered sugar!
My personal favorite filling is spinach, ham and mushrooms - I lean towards the savory over the sweet. I made crepes for breakfast this morning (yep, they're an all day snack) and realized that mushrooms need to be a staple item in my house!
What is your favorite filling?
Disclaimer: I received the pan at the IFBC conference and this post is one of three that I had to write as a blogger attending IFBC.
At last year's International Food Blogger's Conference, I attended a breakout session sponsored by the American Lamb Board, Curriculamb 101. Historically, I've not really liked lamb - it's had a gamey taste, it's been tough. But surprise of surprises, I have 56 lamb recipes clipped in my Evernote Recipes notebook. My lovely wife likes lamb and I'll give it the old college try and make it for her on special occasions. So, I attended this breakout to learn more about lamb and see if it could get me across the threshold to be a fan of lamb.
Roast lamb with mashed carrots
I learned quite a bit about lamb, particularly that quite a deal of lamb is produced here in the Pacific Northwest and that the gaminess comes from the age of lamb. Domestic lamb is usually younger than imported Australian lamb - because we don't have a huge demand for wool in the US. In Australia, they'll keep their lamb a little longer to be able to shear their wool a few times.
One leg of lamb
And as an added bonus for attending the breakout, the American Lamb Board gave me a boneless leg of lamb to roast for my family! One more try to make me a lamb lover and an opportunity for me to make Heather a nice meal.
Neither recipe was difficult, but it was one of those meals that took several hours as the leg of lamb needs to be in the oven for almost 4 hours and then rest. At least this way, you're only really cooking one thing at a time.
After several hours of roasting (and a fair bit of hoping on my part that it was fully cooked), I had some wonderful lamb ready for dinner.
Leg of lamb, all roasty!
It was good and it definitely opened me up to more lamb. I don't actively avoid lamb nowadays, but it still hasn't made itself a commonplace meal on my table yet!
Thanks to the American Lamb Board @fanoflamb for the meat and if you're a food blogger, think of heading to IFBC 2016 in Sacramento July 29 -31, 2016. This is one of my posts in return for a discounted blogger conference rate.
Recently, I wanted a treat for dessert. I knew that mug cakes were quick and easy and I wouldn't have to turn on the oven on a hot summer night. I did a Google search for Paleo Mug Cake and found this recipe. I looked at that recipe and realized that it did look good, but I thought I knew how to make it a better paleo mug cake.
Just make sure you have a big enough mug!
Now let me warn you, as mug cakes go, this is a pretty labor intensive recipe. For most mug cakes, you just throw everything in a mug, give it a stir and pop it in the microwave. This recipe has two cooking cycles and you have to add ingredients in a sequence. But don't let that deter you; its still far easier than making a cake and having to warm up an oven.
Melt 3 tablespoons chocolate chips and coconut oil in the microwave in a mug. I will set my microwave to 70% power and microwave for 20 secs and stir, multiple times. This way, I get a good melt, but without burning them. Plus, sometimes chocolate chips hold their shape even though they are melted.
Stir the coconut flour, espresso and baking soda into the melted chocolate. Then add the egg and mix it well - if you don't, you'll be left with little worm like strings of egg white in your cake, which is kind of weird.
Add the remaining chocolate chips for little fudge-like nuggets in your cake. This step can be omitted, it makes for a pretty rich cake, especially if you use dark chocolate.
Cook it all in the microwave for about a minute and a half. It should be dry when tested with a toothpick. Let it cool a bit and enjoy.
Yesterday morning, as I was making coffee, my wife asked me why I was using a hand grinder to grind my coffee beans and not using a machine. I recently purchased a burr grinder and its taken my coffee making to a new level. Her question made me think some - sure the hand grinder is one-third to one-fifth the price of an electric machine, it appeals to my price sensitivity, but there is something more to it.
My answer was that I could take the grinder with me when I go camping or traveling, continuing the idea that I could make great coffee anywhere. But more and more as the day went on, I realized that it was about slowing down to enjoy the moment.
Over the last few years, there are a few old skool methods and technologies that have re-surfaced in my life. I've started to make coffee with fewer machines, just different manual brew methods. It takes more time than just pushing a button on a super-auto espresso machine or popping a K-Cup in the machine and I get to enjoy the act of making the coffee. The grinder was just another step in that direction, only adding a minute or two to the process, but allowing me time to think about where the beans came from and how they were ultimately turned into the drink I'm about to enjoy.
The same thing with shaving. Yes, shaving, something I've been doing almost every day since my late teens. I've always hated shaving, but I hate been un-shaven even more. I'd shave while I was taking a shower, taking advantage of the fact that the hot water would have already softened my beard (yeah, it grows that fast). It just became one of those things I'd do.
About a year ago, I got a double edged razor for my birthday - old skool, like your grandpa used. It takes a little longer, but the slowing down gives me the time to listen to the sound of the whiskers being cut, enjoy the smell of the shaving cream or feel the soap lathering on my chin and neck. I look forward to shaving now; it's a calming experience.
This year, for my birthday, I got a few cast iron pans. I find it amazing that cast iron pans cost less, last forever and cook better than the modern, copper, stainless steel and non-stick pans. I don't know why its taken me so long to start using them - I love them. The trade off comes in that they need to be seasoned, heating the pan and oiling it down, and entirely dried to prevent rusting. But with slowing down when taking care of these pans, the food browns better and still doesn't stick to the cookware. Fried eggs have crispy bottoms and beautiful runny yolks.
There is something to be said about returning to the classics, the old skool ways of doing things and stepping away from the push button automation or the arms race of how many blades can be squeezed into a razor. Slow down and enjoy the moment even when you're getting things.
The first month of the new year has wrapped up. Maybe you set the goal to eat healthier in 2015 and after a month, the idea is getting a bit stale or hard to maintain. Maybe you just finished the Whole 30 and are thinking about how to make some of those healthy eating changes stick. Maybe you're trying to figure out how to keep your new morning routine of working out and still get to work on time. I'll show you how easy it is to poach eggs - so easy you can do it at work.
I'm excited to be working with NestFresh, a producer of cage free eggs. On top of having plenty of room for their egg layers, NestFresh uses a network of smaller, family run farms across the US, getting you the freshest eggs. Since eggs are such a great food, I'll be writing a few posts over the next few months about how to cook eggs - there are so many ways to go beyond scrambled and fried!
And if you looked carefully at that picture above, you'll notice it is on a paper plate. I made that egg at the office!
Eggs are a healthy ingredient, loaded with vitamins and nutrients and a great source of protein. If you eat Paleo, they're a low-cost, clean, nutrient dense food, as opposed to other clean, protein sources.
Over the years, I've always viewed poached eggs as special, sort of a rarity. You have to be at a certain class of restaurant to see them on the menu, often as Eggs Benedict. Your local greasy spoon probably doesn't serve them, and if it does, your local diner probably isn't very greasy.
I will often make poached eggs on those special brunch holidays, like Easter or Mother's Day, and it is almost always for Eggs Benedict or replacing the Canadian Bacon with smoked salmon (rapidly becoming my preference). I've got inserts to cook them in a sauce pan, a special pan with poaching cups and have learned the great method to cook them just in a pot of water. Like making eggs any style, it is pretty easy, but it takes either some preparation or attention or some gadget to poach them.
But I've learned to make poached eggs in the microwave.
Ingredients and Equipment
1 or 2 eggs
Small, microwaveable container 2 - 3 cups in size
Water
Steps
Fill the container approximately 2/3 full with body temperature water. I use my finger to assess the temperature and want it feeling neither hot nor cold. Poaching in the microwave is very sensitive to the initial water temperature - beware if one of your office mates was washing their coffee cup right before you fill your container.
I've also found that the shape of the container is important, the transition between the sides should be curved, not a 90 degree angle (like in many take away soup containers).
Crack your eggs into the water and cover with a paper towel. While I've never had a yolk explode on me, I've had pockets in the white pop which makes quite a mess on the inside of the microwave. The curved corned in the container help prevent those pockets. Just cover it - you don't want to be the person who makes a mess in the office microwave.
Put the covered container in the microwave and cook on high. This step will take some experimentation, depending upon the size of your container, the number of eggs and the power of your microwave. In the picture below, I'm cooking two eggs in a 1000 watt microwave - it takes about 3 minutes. When I'm using a 1200 watt microwave and only cooking one egg, it takes about 65 seconds.
As you try this with your microwave, remember, its far easier to add more time and cook it longer, rather than to un-cook the egg. And once the egg nears being done, 5 to 10 seconds can make the difference between runny yolks and solid yolks.
Take the eggs out of the microwave and test for doneness. They white should be firm and the yolk should still be soft to the touch. I've never found that the water is too hot for me to use my finger to make this check. If they're not done, put them in for a little more time.
\
Carefully drain the water from the container. You'll want to do this promptly, because the egg continues to cook in the hot water. The egg will barely stick to the container, so I often use a fork as the filter to hold my egg back and let the water flow out. You're so close, you don't want to lose the egg down the drain at this point!
Transfer the egg to your breakfast plate, with some clean sausage or bacon and my favorite, mashed sweet potatoes. Season as you see fit (I've not yet brought a salt and pepper shaker or Sriracha to work yet) and enjoy.
Once you work out the specifics for your microwave and bowl you are using, this is very simple to do. I take my eggs with me to work in the morning and a container of pre-cooked sausage and smashed sweet potatoes and make breakfast at work. Invariably, I'll get comments about what a great breakfast or on the days I bring a few slices of bacon to microwave there, how great it smells. It beats out everybody else's instant oatmeal or cinnamon roll that they are warming up.
There is a slight downside that I must warn you about. Poaching eggs in the microwave, or in a pot for that matter, is really easy and you might just start doing it every day. The cachet of a poached egg might wear off a bit, but you'll be getting a healthy, delicious breakfast.
Note: I was compensated this post, but this is the way I make my breakfast almost everyday. All opinions are my own.
From the Brooklyn based guys that brought you the Mason Shaker, Shake: A New Perspective on Cocktails is a beautifully photographed book of cocktail recipes, celebrating the seasons and seasonal ingredients in artisan cocktails.
I was given this book to review and if I have to test the recipes (read: drink cocktails) to do a little work, I'm game. And these aren't fruity, sweet cocktails either; these are the savory cocktails, focusing on the flavors of seasonal ingredients. With the cover photograph having a sprig of rosemary, I knew this book was for me.
Unlike many other cocktail cookbooks, this book is organized by season. Each recipe uses seasonal ingredients: sage and grapefruit in winter, fresh berries in spring, watermelon and stone fruit in summer and apple cider in fall. Using the freshest ingredients makes for the best flavored cocktails and the recipes were driven by what they could find in their Brooklyn farmer's markets.
Each recipe is beautifully photographed, including the ingredients artfully displayed and the finished drink. After making the Rosemary Maple Bourbon Sour as my tester drink, I passed the book to my wife to choose our next cocktail. She was unable to choose a drink, because "this book is like Instagram for cocktails."
A photo posted by Heather Murphy-Raines/Scouts H (@unitedstatesofmotherhood) on
Something else I loved about this book was that each season included a non-alcoholic drink, still focusing on those seasonal ingredients. I enjoy a cocktail, but more than one or two and I stop enjoying them and just want to sleep.
The book excerpt has a few recipes, so you can check out the drinks and decide if this is the book for your cocktail library. I'm not sure if this book belongs on my cookbook shelf or on display on my coffee table. Its a beautiful book on its own, with wonderful recipes contained inside.
As stated in the review, I received a copy of this book for review from Blogging for Books. Other than the book, I was not compensated. The opinions in this review are my own and I wouldn't have shared it with you if it wasn't a great book.
Last weekend was the 2014 International Food Bloggers Conference, where brands and bloggers got together in Seattle to network, learn and enjoy good food. With breakouts on Food, Writing and Technology, there was something for every food blogger. I had an enjoyable time and actually got to meet some bloggers in real life. Ironically, some of those I met live in my same neighborhood.
What was great about this year's conference was that there were many brands represented in the healthy space, and for me, that means acceptably paleo. Dinner last night was brought to us by the swag from these brands.
The local sausage company, Isernio's, which makes clean chicken and pork (didn't know this before the conference) sausage.
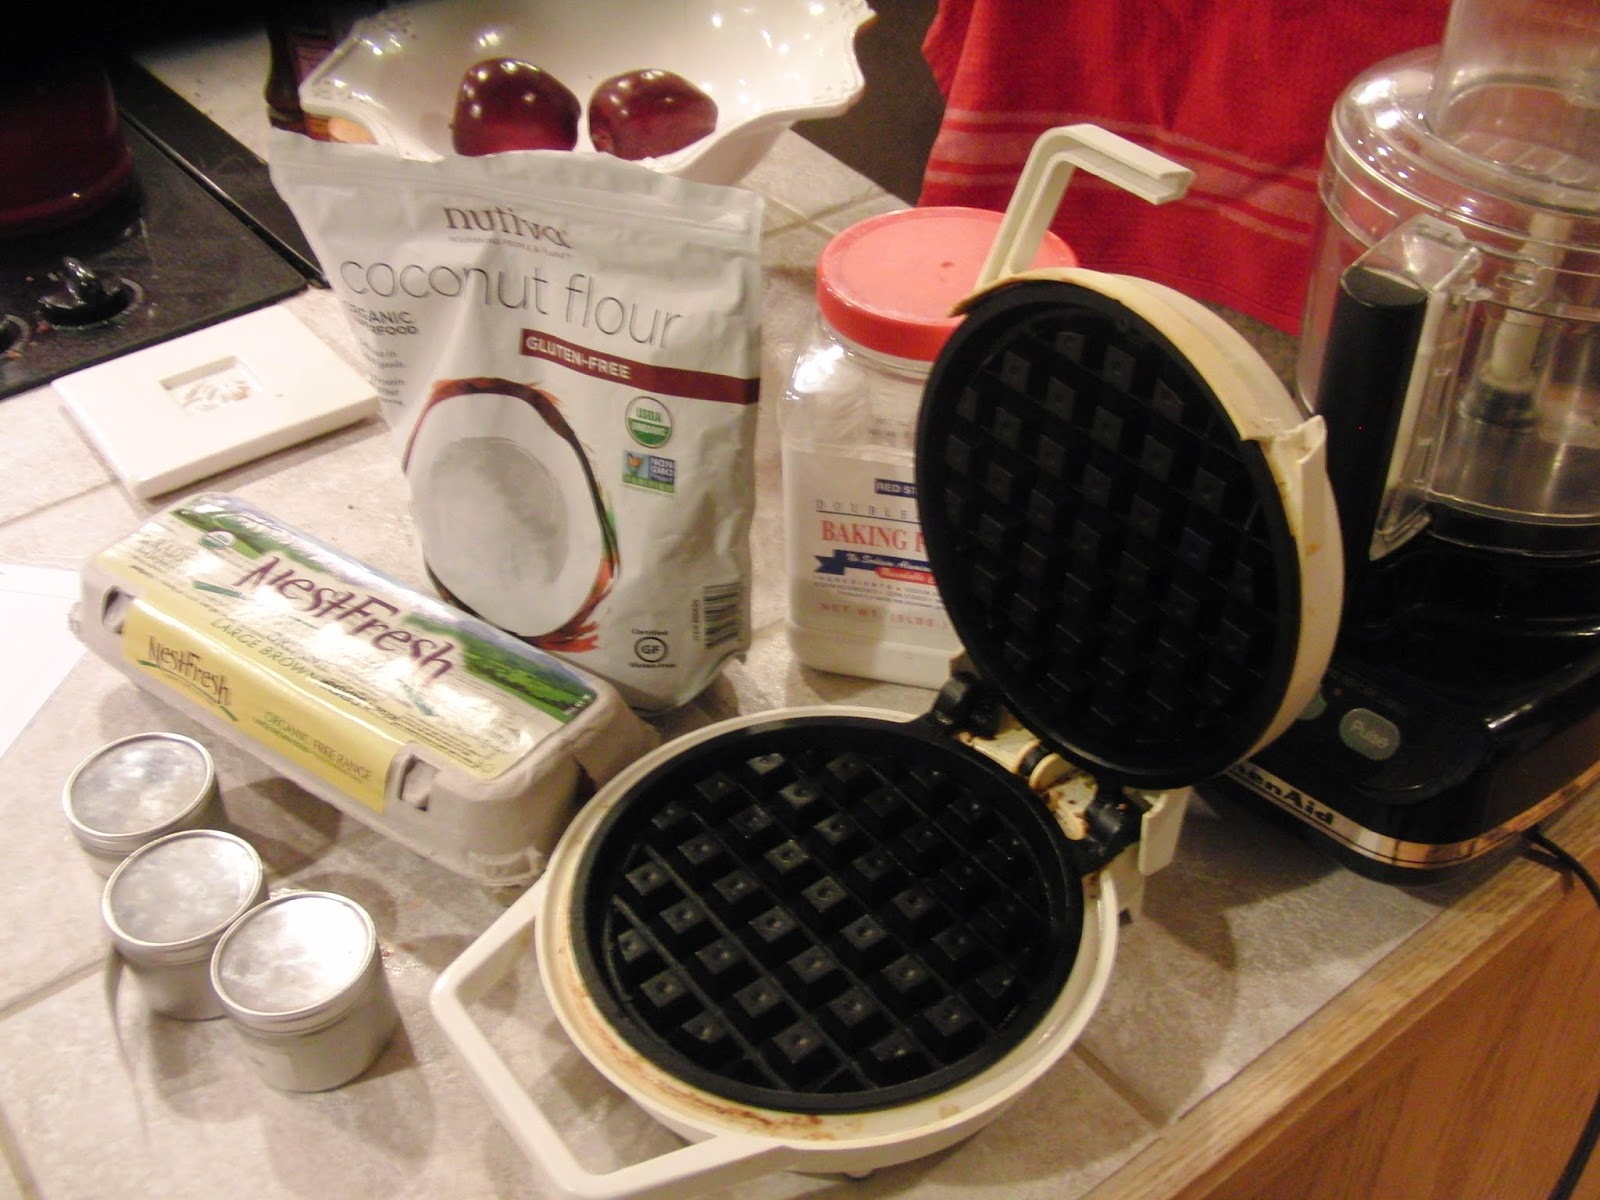
Nutiva, which makes coconut products, like coconut oil and flour
I had a hole in my tummy that was looking to be filled with waffles, so that's what I decided to make. After going through my paleo waffle recipes (thank you PaleOMG), I found that they all required coconut milk, of which we had none.
It was almost 8pm and we were getting hungry. I knew that its only an 8 minute trip, one way, to the grocery store. So, yes, I did make a grocery store run for coconut milk and a few add-ons as I dashed out the door.
Paleo chicken and waffles.
I made PaleOMG's Savory Waffles and topped them with browned Isernio's Chicken Breakfast sausage and some of Heather's spicy (homegrown) ketchup. While the savory herbs in the waffles complimented the sausage, the waffles were dry. Her recipe actually tops them with a gravy and they needed the moisture from a gravy, for sure.
What was neat about IFBC was that these were all products I already enjoyed in my clean eating and I got to meet brand representatives and see some new products (more on that later).
Disclaimer: The chicken and eggs used in this post were some swag from the conference. I ate this stuff already, so I already thought it was great before I got some free coupons! While I wasn't compensated for this post, I did receive a blogger's discount for attending the conference and this post is meeting a part of what I had to do in return for the discount.
I've always enjoyed Poached Eggs. They've always had a special cachet to them - most restaurants don't have them on the menu, unless you get Eggs Benedict, another favorite of mine. And it takes a certain caliber of restaurant to have Eggs Benedict. I used to only make poached eggs when I was making a special brunch, New Years, Easter, Mother's Day, Father's Day or having friends over for brunch. I have several gadgets and even a special pan with inserts to make poached eggs, which I would leverage quite frequently.
My go to breakfast: poached eggs, mashed sweet potato and bacon. Photo by Heather.
But after some research, I learned how easy it is to make Poached Eggs in just a pot of water. And now, sadly, Poached Eggs have lost a bit of their cachet, because I eat them just about everyday (which makes me happy - a net increase in happiness). Heather had posted several photos of the breakfasts I make for her with poached eggs, and one of her friends asked how to make poached eggs. I decided to make a video of the method.
Without further ado, here is my first ever cooking video! Enjoy.
If you give it a try, let me know how it works out for you in the comments, either here or on YouTube. As a teaser for a future post, you can also make poached eggs in the microwave! Think how awesome your breakfast in the office could be!
The rest of this post is about making the video, so if you just wanted to learn about poaching eggs, that's all I've got for you today. If you want to see what I learned about making a YouTube video, read on.
It's not the greatest video around, but it was my first go. In making this video, I learned how easy it is to make videos for YouTube. The YouTube editor is pretty nice for working with multiple clips and provides some reasonable editing capabilities. I shot all this video with my phone, and in fact, the last half was inverted because I held my phone with my left hand, upside down so I could reach the buttons. Little did I know that the display would be right side up, but the video wouldn't be. However, YouTube came to my rescue and I was able to invert part of the clip!
Almost a year ago, I attended the International Food Blogger's Conference and a blogging chef recommended I try out food videos. IFBC 2014 is less than two weeks away, and I've finally done it. Here are a few things I learned while making this video - its probably the quality of what would be turned in for a high school project, but the lessons are still a good foundation.
Shoot in multiple clips. The editor can help you put them in sequence, even if you need to re-shoot a portion, and trim the starting and ending points. You'll notice that the video hadn't started when I was talking about bringing the water to a full boil.
I recorded my audio at the same time as my video. I didn't script it or prepare too much for it. You'll notice I was repetitive at times and stumbled over the words and simultaneous actions. With the editor I can turn off the volume on the video clip and lay an audio track down. That audio track could even be a new video, but it will only play the audio portion. This way you can go sequence everything and even talk through the transitions. I'd plan on redoing this video with a better audio track, with some introduction speech and some voice over the "what you need" picture.
Its easier if you have a helper to actually hold the camera. When it comes to food preparation, there is only so much you can do with one hand. Talk through the shot with them before hand. I didn't tell my son that I'd want to show the eggs right after plopping them in the water, hence the finger pointing.
I thought that this was a fun medium to work with and I plan on making more of these in the future. if there are any things you'd like me show you how to make, just leave a comment!
This weekend I enjoyed some good food at the hands of my family. As we reduce the amount of junky food in our house, the kids have started to make the things we no longer buy or make for them. They make pancakes and muffins and cookies and sometimes, they even clean up after themselves.
Recently, my daughter has gotten into an ice cream making kick. Her go to flavor has been vanilla ice cream. She has also started exploring coffee and is trying to figure out what she likes, which borders on the super-sweet caramel lattes. Her tastes are still developing. I had a few servings of cold brew coffee in the fridge, which I surrendered to her and she made coffee ice cream!
It was good ice cream too, coming from a former ice cream man and coffee lover. I did make sure that I got a few scoops because usually the ice cream she makes is consumed shortly after it is made. Though the kids all make good food, they don't defer any enjoyment.
Heather's green thumb has provided some good things, too. The tomatoes are finally ripening and I made a delicious tomato salad, with the bright flavors of the cherry tomatoes and the basil that she grew on our counters. With some coarse sea salt and a splash or two of olive oil, it makes for a quick, fresh salad. I used Oregon Olive Mill's Arbequina for its peppery taste.
What did you eat this weekend, that you still relish two days into the week?
Thanks again to Oregon Olive Mill for the olive oil samples and to Heather and Chase for making good food and ingredients available to me!
Saturday, Macy's in Alderwood Mall hosted the Culinary Council's Grilling Guru's semi-finals. Three west coast home cooks brought their grilling best and were judged by local chef Tom Douglas. I had front row seats to watch the grilling, taste the dishes and even get samples cooked by Tom Douglas himself!
The Culinary Council is comprised of some of the nations culinary masters. Tom Douglas represents Seattle and the Northwest, with the aim of teaching Macy's customers to cook and shop like master chefs. I like this way of thinking and I try to embody that in all of my cooking endeavors.
The Northwest Region was represented by three grilling gurus, Jack Scalfani from California, Margee Berry from Washington and Edwina Gadsby from Idaho. Jack hosts a popular YouTube channel, Cooking With Jack. His rib recipe and techniques were passed down from his Mom. Margee has been competing in food cook offs for over thirty years and her shrimp taco recipe was her own invention. Edwina has gone head to head with Margee several times over the years and taste tests her recipes on her husband and the bad ones end up on the dog's plate. Good recipe or not, they're both lucky guys. The winning recipe is posted at the end...
The competitors had 1 hour to grill their dishes for Tom Douglas and with a '3, 2, 1 Go!' they were off. The grills were hot, the sun was hot, but none of the cooks showed any nervousness. To keep the audience entertained while the grilling was going on, KOMO 4's Seth Wayne hosted giveaways of The Dahila Bakery Cookbook and Q&A's with Tom Douglas.
While watching the competitors cooking, Tom and his crew whetted our appetites with some of his grilling. A big gulf shrimp with a kalamata olive and some beautiful planked salmon kept the audience at bay when the wind shifted just a bit and we could smell the deliciousness from the grills.
Tom didn't fail to entertain either. In his usual funny fashion, he joked about how far north he was from his South Lake Union restaurant domain saying, "I'm so far North, I might as well be in Canada!" In addition to his funny commentary, he shared some valuable and interesting cooking tips.
Too much oil when grilling can lead to soot. Grill marks are good, but soot is not.
Grilled avocado is a hot thing in restaurants these days.
I've made milk shakes from avocados, but I'd never thought of grilling them. The soft texture doesn't seem like it would take to grilling well. It even got a rise from my Twitter followers.
It's worth giving it a try, especially since many of the avocados we buy need some additional time to ripen.
The competitors all finished before the allotted time and plated their food for Tom. It seemed like the Jack's ribs were going to win, but the perfectly cooked salmon for the noodle salad was the ultimate winner. I'll agree, grilling salmon is a little bit on the challenging side, getting it to that just cooked all the way through, still slightly translucent in the center, Edwina nailed it.
There were five other semi-final events like this taking place across the United States. As the Northwest's winner, Edwina is on her way to New York City, to compete in the Culinary Council's Sizzle Showdown on June 28th. She'll be judged by Chefs Johnny Iuzzuni and Todd English, competing for a $10,000 Grand Prize. Wish her luck!
The Winning Recipe
Grilled Sweet Chili Salmon Noodle Salad
Recipe compliments of Edwina G of Hayden, Idaho
Disclaimer: I am a member of the Everywhere Society and Everywhere has provided me with compensation for this post about Macy’s Culinary Council. However, all thoughts and opinions expressed herein are my own.
People are putting butter and coconut oil in their coffee. And they say its the greatest thing - more focused, more energy, feeling satiated. I read it on the internet and like many things, I took it with a grain of salt. Then, a few weeks back, I decided to give it a try. I'm a morning person. I like to get up, work out and then eat breakfast. My regular wake up time is 5:20 AM, so, usually within 2 or 3 hours of getting up I'm eating breakfast.
My daughter has an early morning swim practice which starts at 5AM on Wednesdays, which means we're both up at 4:20AM. I can still go to my 6AM CrossFit, but that really messes with the eat breakfast within 2 or 3 hours. The same week that inspired me to try Bulletproof Coffee (aka butter coffee), I had some changes to my morning schedule and I was going to go to CrossFit at 8AM. But I still got up at 5:20, which didn't quite leave enough time for breakfast to digest - and no one wants to go to CrossFit with a full stomach. So I decided to try Bulletproofing my coffee, and see if it was worth it.
Bulletproof coffee is simply your morning coffee with a tablespoon of coconut oil and a tablespoon of (grass-fed) butter. The clean fats provide calories (energy) and really make the coffee creamy. Drinking something is easier and quicker to get down than eating something, so its a way to kickstart your day. You can read more about it and get a recipe here.
My first day trying out Bulletproof coffee was an early morning swim practice day. I made my coffee with my Caffe Vita Theo Blend beans after dropping her off at practice. I used the blender to mix it all in, some people just let the hot coffee melt the fats. The coffee had a nice frothy top and boy was it creamy tasting.
Now here is a little something about me, I like coffee for its taste. I drink my coffee black, my drink of choice is an espresso. But no cream, no sugar. If I drink an espresso, its so dry the foam just stays on top. Its all about the flavor of the coffee. And so much fat in the drink covered up the coffee flavor. It was like a super-creamy latte. So, it loses a few points for covering the taste of my coffee.
I drank it on my way to CrossFit and was feeling quite energized. My workout went well and I wasn't really that hungry when I came home, but I ate a small breakfast because... Well because you're supposed to eat breakfast, aren't you? I felt pretty good all day long, but I was also wearing my Captain America t-shirt - he's almost bullet proof.
But that day, I was so thirsty. I couldn't drink enough water. I even emailed some of my friends who've bulletproofed their coffee and they drink 32 ounces of water before drinking their coffee. Lesson learned.
The next day, I got up at my usual 5:20, but wasn't planning on CrossFit until 8AM. So I drank 32 ounces of water and made my butter coffee. I then sat down and worked on an edX.org class I was taking. And I felt really focused, considering I was studying big data analytics at 6 in the morning. CrossFit at 8AM was alright, my energy levels great considering that I hadn't eaten anything and I wasn't all that hungry when I got home and then didn't eat anything until lunch time.
Those two days were a pretty successful test and I've continued to bullet proof my coffee when I have early mornings or planning on going to the later CrossFit sessions. Its been working out well for me. Its almost like a meal replacement - it has enough calories for a meal. I'm energized, focused and satiated. My two big lessons are:
Don't use your great tasting, special beans or single origin beans. The nuances will be lost under the uber-creaminess.
Drink lots (32 ounces) of water before your coffee. I guess it has to do with how the fats are processed by our bodies.
So, what do you put in your coffee and would you put butter in it?
My wife is attending the Disney Social Media Mom's conference this week; she left on Wednesday. The youngest two kids are on spring break and at Disneyland too, and on Friday, their brother joined them.
Heather went to Costco on Monday and bought a big container of strawberries, so its just me and a bunch of strawberries that need to be eaten before they spoil. Usually, in our house of five, with snacks and school lunches, the strawberries would just disappear. But with only two of us for half of the week, our consumption rate slowed significantly.
But I came up with a simple and quick way to make a strawberry smoothie!
I don't like watered down drinks and so a smoothie with ice just isn't as smooth, but sliced strawberries freeze quickly and provide that cold iciness and a banana provides the smoothness.
They don't look it from this picture, but those are frozen strawberries. I cored them and then sliced them, just before we sat down and they froze while we ate dinner. The banana was in the freezer too, but they take a little longer to freeze - at least it was cold when I threw it in the blender.
I used some almond milk for liquid, but coconut milk would probably be a good choice too. Or if you're feeling really like clean eating, make your own almond milk.
Quick Strawberry Banana Smoothie
Makes about 2 16 ounce glasses
Ingredients
2 good handfuls of strawberries
1 banana
dash of vanilla extract
about 1 cup almond milk
Instructions
Wash, core and slice the strawberries. Arrange on a plate and put in the freezer.
Put a banana in the freezer.
Let them freeze for 15 - 30 minutes.
Once you're ready, scrape the strawberries into your blender.
Peel and slice the banana in 1/2" slices into the blender.
Add a dash of vanilla extract and about 1 cup of almond milk.
Earlier in the week, my wife made mayonnaise from scratch and we had leftover egg whites. A bunch of them. When we had left over egg whites before, one of my friends on Facebook suggested that I make meringues. So, some quick Google searches led me to Elana's Pantry where I found both a meringue recipe and a coconut macaroon recipe. Her website has lots of gluten free, grain free, dairy free and paleo recipes, so its a great resource for my cooking adventures.
Both recipes are easy to make only require a few ingredients. The macaroons were quick to make and quick to bake. I'm an early riser, so they were prepared and baked before everybody else was awake. My idea was to make them for dessert tonight.
While they were cooling on the counter, the rest of my family started to wake up. "I only made 10 macaroons, that's two for each of us for dessert. If you eat them before, then there are less for you for dessert."
It was kind of awesome because I made new friends on the internet today and inspired me to make the meringues too.
@scoutshonor@beauraines Dang I love macaroons! You know what I want that doesn't exist? Paleo MERINGUES. ((sigh))
— Monica Ricci, CPO® (@MonicaRicci) April 6, 2014
We traded some tweets, shared the links to Elana's pantry and after CrossFit, I made meringues too. They're easy to make, egg whites and maple syrup, but they take two hours to bake, and then an hour to cool.
They're in the oven and I've already been asked twice by the kids if they really take two hours to bake. Hopefully, this will turn out well and help teach the kids patience and that paleo desserts can be good. With the kids on spring break, they usually turn their idleness into cookie baking. Like octupling the cookie recipe. Maybe my treats can satisfy them for a bit.
Heather kept thinking I was making French macarons with all the egg white beating I was doing. Those take a little more work, but I might try this recipe sometime when I'm feeling a little more ambitious in my cooking!
So there's still an hour to go on the meringues. I think I'm going to go drizzle chocolate on the coconut macaroons! I hope you had a good weekend!
A few weeks ago, I saw a picture on Instagram of cold brew coffee and homemade almond milk. I wish I remembered exactly which picture, but it was a beautiful picture and really made me want to drink it. It was also in the middle of the Whole Life Challenge and I'd drank nothing water, coffee and the occasional tea for about 4 weeks, so that added to the temptation. And it must have been quite a good picture, because it was pretty cold here in Seattle.
So, for the next few days, my Google searches were about how to make almond milk. It is surprisingly easy! And aside from some inactive soaking time, it is really quick.
All you need is a nut milk bag, available on Amazon for $7-10 and something to soak the nuts in. It's basically a really fine mesh filter bag.
There are lots of almond milk recipes on the internet; they seem to vary in how much water you add to the nut milk after soaking and what kind of sweetener if any. My wife's aunt changes out the water while the nuts are soaking. Some people use a food processor and some use a blender. But basically, its the same.
I've only tried sweetening my almond milk with honey and stevia and though I'm not a fan of stevia, the stevia was a better choice. But most of it, I drank unsweetened. It was nice to bring a small container to work and have that with my breakfast.
But best of all, its clean - no fake stuff, no chemical additives. Just nuts and water. Because it doesn't have the additives, it needs to be shaken before drinking and might not be as thick as commercial almond milk. On my next batch, I'm going to try to add some coconut milk. It might add some sweetness and give it a thicker mouth feel.
On the downside, its not cheaper than the commercial stuff, at least for me to make it. With my nut supply and water ratio, it costs me about double what I can pay in the grocery store. I get just over a pint with 1 cup of nuts and I don't have a cheaper nut supply than Costco. My wife's aunt, she has almond trees in her yard. It'll be pretty low cost for her. This is the trade off for eating clean though. Having raw nuts does give you some flexibility though, I was roasting nuts with all kinds of different seasonings and making milk. You can't do that with your container of roasted nuts!
Homemade Almond Milk
makes about 2 cups
Ingredients
1 cup raw almonds
water to cover nuts while soaking
2 cups water for blending
Something to sweeten the milk, optional. This could be stevia, honey, maple syrup, vanilla extract or ...
Directions
Put the nuts in a container, cover with water and let soak for 24 - 48 hours. Change the water occasionally. The nuts will swell some. The longer you soak, the creamier the milk will be.
After soaking, drain the nuts and place the nuts in a blender with 2 cups of fresh water.
Blend the heck out of the nuts on the blender's highest speed. You want everything to be a relatively homogeneous slurry. It'll take a few minutes.
Filter the nut milk through the nut milk bag into a container. Squeeze the bag and get as much of the milk out as you can. This is your finished product. Some bags are designed to hang and let gravity do the work, but this part only takes a few minutes of squeezing.
Mix in your sweetener, if you choose to be a little sweeter.
Store your milk, covered, in the refrigerator. I'm told it will keep for a week, but I've never had enough to last that long!
Five days a week, I eat breakfast at my office. I do prepare my food in advance, so I've got something good to eat, but almost everyday, its at my desk. And by doing my food prep, I eat the same thing all week long. So, on the weekends, and especially Sunday, because I have more time, I try to make those breakfasts special.
Typically, on Sunday, I'll read a cookbook as I eat my breakfast and enjoy my espresso. Today, while there was no reading, I still found a way to make breakfast special. As a crossfitter, I eat a lot of sweet potatoes and most of the breakfasts I make include them in some form. And today, I found a new way to eat them. I made paleo biscuits!
I split my biscuits in two and served them with some sauteed spinach and poached eggs. I've really gotten into poached eggs of late, but that is a topic for another post.
PaleoOMG's recipe for Shrimp and Jalapeno Sweet Potato biscuits was my inspiration. I had neither shrimp nor jalapenos, so I just left them out, and to fill the gap, I added some onion powder. And to top it all off, they're Whole Life Challenge compliant (even for the Advanced nutrition challenge). What, you thought I was going to top it with jam? Maybe bacon jam, once I figure out the right way to make that paleo.
The recipe is pretty quick and easy to make, they don't really take longer than making baking powder biscuits. I did microwave my sweet potato instead of cooking it in the oven, that sped things along.
I'll definitely be making these again and want to try the original recipe, but it was great to have biscuits in the morning with breakfast.
I'm participating in the Whole Life Challenge and because I chose the advanced nutrition rules, my occasional dark chocolate for dessert is out. But dates are a wonderful, wholesome, sweet snack and can make a delightful dessert.
A co-worker mentioned that he ate this at a Seattle restaurant and he and his wife made them when they were on a Whole 30 challenge. I had a 2 pound box of dates from Costco and a sampler of Oregon Olive Mill oil, so I decided to make them myself. Its not hard, only takes a few minutes and really showcases the ingredients. For this recipe, use the best quality oil and salt that you have, it will really make everything pop.
Oregon Olive Mill grows olives in the Willamette Valley on a fourth generation farm. They harvest their own olives and them mill them in their own mill. They have 13,000 trees that grow 3 varieties of olives making a top quality extra virgin olive oil. Each variety yields an oil with a different taste, mouth feel and importantly, an after taste. For this recipe, I used the Tuscan Extra Virgin Olive oil, because it had the most robust taste.
I used San Juan Island Sea Salt, a local Pacific North-West manufacturer of sea salt from our very own Salish Sea. I got a sample of this salt at the International Food Blogger's Conference and it is a favorite of mine. The salt has a brighter, crisper flavor than the french sea salts and is in much finer crystals than the Tibetan pink salt. When I'm finishing something and want to taste the salt, this is the one I use.
I think that having a tasting party of olive oils, salts, wine, whisky or chocolate would be a pretty cool thing to do. Not all at once, but maybe a series of parties. Hmm, ideas...
Dates Warmed in Olive Oil with Sea Salt
less than 10 minutes Ingredients
1-1/2 Tablespoon of your best olive oil
3 - 4 dates, pitted
Sea salt, fine grained, best quality
Warm the olive oil in a small pan, over medium heat. You don't want the oil to get warm like you'd cook meat with it, but just warm.
Put the pitted dates in the olive oil and gently roll them in the olive oil. Do this until the dates are warmed through, 3 or 4 minutes.
Once the dates are warmed, put them on a plate and give them a generous sprinkle of sea salt.
Serve and enjoy!
Disclaimer: Other than the sampler of the Oregon Mill Olive Oil, I was not compensated for this post. The opinion and recipe are my own. And if I wasn't paleo, I'd be dipping bread in this oil and just eating it that way. It's that good.
Because I'm participating in the Whole Life Challenge, I bought a package of dates earlier this week. Dates are a handy quick snack and great if you want something sweet. I enjoy eating the dates straight, wrapped in prosciutto, or as an ingredient in my paleo protein shakes. I also picked up a box of Lara Bars which I enjoy as well.
Having a bounty of dates, I decided to try making my own Lara Bars. And because I can never find the Cappuccino Lara Bar, that was the flavor I decided to take on.
They were pretty simple to make and this way you can make your own flavor combinations. I could have used some cocoa to make this a mocha Lara Bar. Another alternative I'd like to try would be with some unsweetened coconut and maybe chocolate (once the WLC is done).
What flavors do you think would be good to try?
Ingredients
12 dates, seeded
about 1/2 cup pecans and roasted almonds - about equal in quantity to the dates
1 tablespoon of finely ground coffee beans
Cut the dates into small pieces and pulse in the small bowl of a food processor until they are smaller. Yes, I know how silly of an instruction that sounds.
Add the nuts and continue to pulse the dates and nuts. The dates will become stickier and pickup the nuts and the nuts will get to a chopped consistency.
Add the ground coffee and pulse it a little more. It will probably form some balls in the food processor bowl.
Dump the mixture into another bowl and further mix it with your hands. When its well mixed, roll it into a ball.
Place the ball between two sheets of parchment paper and press into a bar like shape. I used my hands to form a rectangle and then used a rolling pin to help flatten it (Thanks to Nom Nom Paleo for that set of instructions).
Cut the bar into individual serving pieces.
Wrap in your parchment paper so they don't stick together and store in the refrigerator.
I think that every word in that title is awesome. Any one of those in a dessert is great and if you combine them, its like multiplying awesomness. At my CrossFit box's holiday party, they were going to have a paleo recipe contest. When I read this recipe on Civilized Caveman's blog, I knew it was the one I was going to make.
George, from Civilized Caveman, got a copy of The Paleo Chocolate Lover's Cookbook, and he shared the recipe on his blog. My local library has 16 copies and one is on hold for me. I'm waiting with bated breath.
All in all, its pretty easy to make, but it does take some time to allow the chocolate and caramel to cool. When I made a larger, second batch, I actually took advantage of the unusually cold weather we were having in Seattle to cool my caramel on the back porch!
My daughter helped me with these photos. The film strip doesn't do them justice.
Don't worry that the recipe has warnings to wear gloves, the coconut milk and sugar don't seem to get as hot as non-paleo caramel's cream and sugar, but do use a large enough pan. I made a single batch in a 2 quart sauce pan and it does bubble up. Do clear a bit of space in your fridge so that you can fit your chocolate to cool on a flat space.
Reading the recipe on my borrowed tablet on a Belkin Tablet Chef Stand!
Also, give it plenty of time to cook. My first batch, I cooked a little hotter than my second batch and it came out much more like a sticky caramel candy, but it was harder to drizzle over the top of the chocolate. My second batch, I simmered longer, but at a lower temperature, and it was a thick caramel sauce.
You'll see in one of my pictures, I wasn't using parchment paper, but some plastic wrap. Make sure whatever layer you use covers the sides of your pan, don't just use a Silpat. The chocolate will leak under and stick to the pan and you won't get nice bark.
Bacon, bacon, bacon!
I also had one not-really-a-problem problem. Both times, I had too much bacon. I mean, too much bacon for my candy, but between my kids and I, we ate it right up. Some problems, like high sales rates, are good problems to have.
The Paleo Salted Caramel Chocolate Bacon Bark was a hit at the party, even among the people that weren't all that into sweet and savory combined into one. Alas, it was not the winning recipe of the night; that honor went to a Korean BBQ chicken recipe. I'll admit it, it was really great chicken, cooked perfectly, with just the right amount of smokiness from the grill.